Close
Page 17 of 20 FirstFirst ... 7121314151617181920 LastLast
Results 161 to 170 of 195

Hybrid View

Previous Post Previous Post   Next Post Next Post
  1. #1
    Rails against Big Carrot JohnnyEgo's Avatar
    Join Date
    Sep 2011
    Location
    Greeley, CO
    Posts
    1,371

    Default

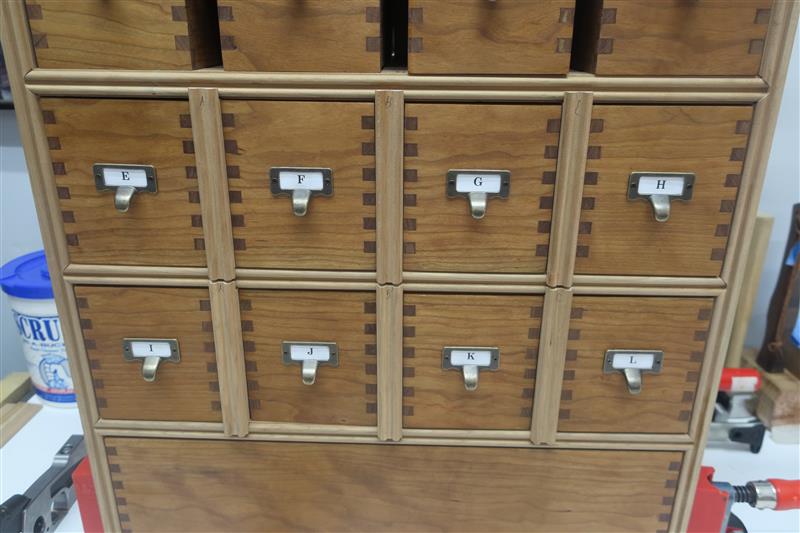
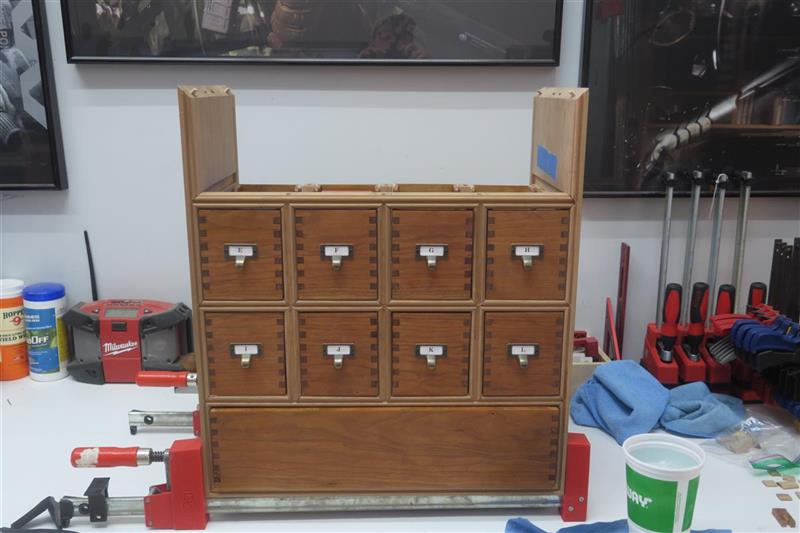
    A lot of it I bring on myself. If there is one thing I have become passably good at over the years, it is fixing unintended consequences. One of the dumber choices I made was the up-front choice to make the boxes first, then make the carcass. There are a lot of people who swear by that method, and it probably does work really well if you are making a desk or a dresser with a limited number of drawers, and where you are face framing and can easily make adjustments. But it has proven to be a nightmare with 13 drawers and no face framing to hide bad choices. Just have to figure out a way to make it work at this point.
    Math is tough. Let's go shopping!

  2. #2
    Rails against Big Carrot JohnnyEgo's Avatar
    Join Date
    Sep 2011
    Location
    Greeley, CO
    Posts
    1,371

    Default

    Front Cross Piece Work
    I got in some good practice with the back lattice, and I had a definite plan. Parts of this went surprisingly quick. First, I cut the cross pieces to 3/4" over the width of the openings:


    Marked them up carefully, labelled them well, and then wasted 3 of my 4 extra test pieces on getting the Domino aligned so that it would be perfectly centered. But once I had that locked into place, it took no time at all to route some extra deep Domino mortises in all of these.


    Very happy with how well the mortises and tenons align before any trimming


    Next, I cut some rabbets into each end. These were spaced with the help of a 5/16" brass spacer to give me consistency across all pieces.


    Math is tough. Let's go shopping!

  3. #3
    Rails against Big Carrot JohnnyEgo's Avatar
    Join Date
    Sep 2011
    Location
    Greeley, CO
    Posts
    1,371

    Default

    Fitting:

    I had thought the back fitting would go quick, because it is way less complex than the front fitting. I was wrong. This ate up the entirety of the day, mostly in pulling everything apart, making a couple of adjustments, putting everything back together, and then repeating over and over again.

    Five of the drawers fit as planned. Seven needed to be fitted, because of small but stacking variances between where I had intended to put the cross-pieces, and how they actually stacked up over five panels.


    Even though I planned and measured a bunch of times, I ended up with the farthest vertical row being spaced too close to the left panel. The other four boxes just needed trim here and there, mostly reflecting the box itself being less than perfectly square after glue-up


    Did the best I could to make sure everything had at least a little bit of space for expansion. In theory, the way I ran the grain on the boxes, they should tend to expand vertically rather than horizontally.


    Took all day to get here. All day.


    Getting there.
    Math is tough. Let's go shopping!

  4. #4
    Rails against Big Carrot JohnnyEgo's Avatar
    Join Date
    Sep 2011
    Location
    Greeley, CO
    Posts
    1,371

    Default

    First fitting. These are super tight, but the first fitting is only about making sure they are consistent and aligned vertically. This turned out better than I expected.


    A very little bit of trimming just to make sure edges aligned where I wanted them to.


    Coming along nicely.


    Now to make the cross piece miters. I've mentioned before that I do everything possible to avoid taking my sawblade off of 90 degrees. So the 45 degree donkey's ear jig came out. I have a brand new blade in with a flat top profile. Even though it is a ripping blade (few, far spaced teeth), it is new and sharp and I figured it would be clean. It ended up cutting so clean that I didn't need to cut wide of the miter and trim the chip out away with a hand plane. Very happy with this.


    All the crosspieces mitered up.
    Math is tough. Let's go shopping!

  5. #5
    QUITTER Irving's Avatar
    Join Date
    Nov 2008
    Location
    Denver, CO
    Posts
    46,527
    Blog Entries
    1

    Default

    Looking good!

  6. #6
    Grand Master Know It All BladesNBarrels's Avatar
    Join Date
    Oct 2010
    Location
    Lakewood, CO
    Posts
    3,657

    Default

    That really is impressive.
    Thanks for posting all the steps.
    Buying Randall Made Knives and Randall 1911 Pistols

    BladesNBarrels Feedback

  7. #7
    Rails against Big Carrot JohnnyEgo's Avatar
    Join Date
    Sep 2011
    Location
    Greeley, CO
    Posts
    1,371

    Default

    After about two months of putting it off, I grit my teeth and got back into the garage for some time dedicated to the really tedious task of mitering in all the cross pieces.


    The first task was to break everything down and trim up cross pieces width-wise. To cover some spacing issues, the center pieces are slightly wider than the pieces on either end, and since I can't trim the case itself, the end pieces can only be trimmed on one side. Once everything is good enough here, all final fitting will be done to the boxes.


    Took a little break about half way through to sharpen my block plane blade.


    Because each vertical run of cross-pieces was a slightly different width to each-other, and a considerably different width to the carcass profile, none of my jigs would work to miter them in. I did it mostly free-hand with the chisel, and a 45 degree fence to keep the final cuts cleanish.


    I definitely got better as I went along. The first three were pretty rough, and there will be a lot of sand and filler work in the near future. But once I got into the groove, I started fitting them better and better.


    Finished the first and second rows, then called it a night.
    Math is tough. Let's go shopping!

  8. #8
    Rails against Big Carrot JohnnyEgo's Avatar
    Join Date
    Sep 2011
    Location
    Greeley, CO
    Posts
    1,371

    Default

    Sunday morning began with some more chisel sharpening. I resharpened after every 5-6 miters. Most of them, I just had to hone on the 12000 grit stone for a few swipes to tighten up a good working edge.
    When they can cut a doubled-up shop towel cleanly across the grain with only the pressure of their own weight, I consider them workably sharp.


    Nothing fancy. Just two cheap chisels, a moderately expensive small chisel, and some marking equipment.


    Didn't take long to get the second rail complete.


    Third followed shortly thereafter. Starting to get pretty good at this.


    All finished. This is a milestone moment.


    Still a lot of work left to do. Got to fit some internal rails so the drawers don't wrack when pulled in and out. Then a lot of glue, sanding, and interior finish work before it can get final assembly and exterior finish. But the end is finally in sight. With any luck, I have about two weekend's worth of work to go.
    Math is tough. Let's go shopping!

  9. #9
    Serial Speed Limit Breaker
    Join Date
    Sep 2020
    Location
    Aurora
    Posts
    1,207

    Default

    A JohnnyEgo Dresser, circa 2021

    (Things that would be said on Antiques Roadshow.)

    Very cool.

  10. #10
    QUITTER Irving's Avatar
    Join Date
    Nov 2008
    Location
    Denver, CO
    Posts
    46,527
    Blog Entries
    1

    Default

    Are the drawers currently labeled just so you can keep track of them while you build?

Posting Permissions

  • You may not post new threads
  • You may not post replies
  • You may not post attachments
  • You may not edit your posts
  •