I think you should get some magnets to keep that door closed.

Colorado AR-15 Shooters Club Discussion Forums
Welcome to the Colorado AR-15 Shooters Club Discussion Forums.
Welcome to the Colorado AR-15 Shooters Club Discussion Forums.

I think you should get some magnets to keep that door closed.
I did, but the whole thing flexes enough that they weren't lining up. Eventually two of them fell off, as you see in the photo. I told the kids she can weld some tabs on to to door and glue velcro on instead.
Or you can just have a free-range tarantula.
She probably wouldn't go far. Especially once the dog or cat saw her.


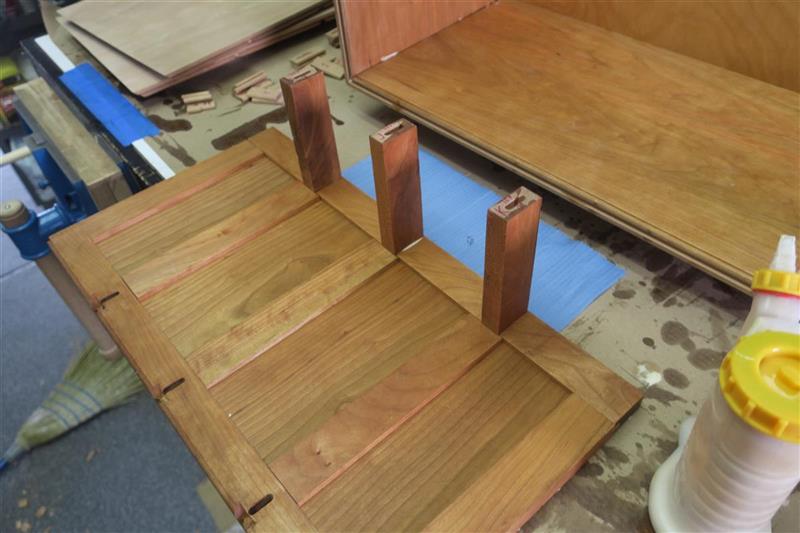
Some tedious stuff that needs to be done. Started out by finally gluing all the panels together. I used cauls, which are slightly curved pieces of 2x4, to help me get even clamping pressure across the glue joint.
A little clean-up, then the interiors got pre-finished. I find it a lot easier to pre-finish than to try and get stain into a bunch of tight corners after assembly.
Did my last dry assembly, and cut up the drawer guides. These will be hit with wax to make the drawers go in smoothly.
All the parts ready for glue.
I used Titebond III, which is a wood glue that dries clear(ish) and has about a 30 minute working time. I used every last second of it to get things in clamps.
Math is tough. Let's go shopping!
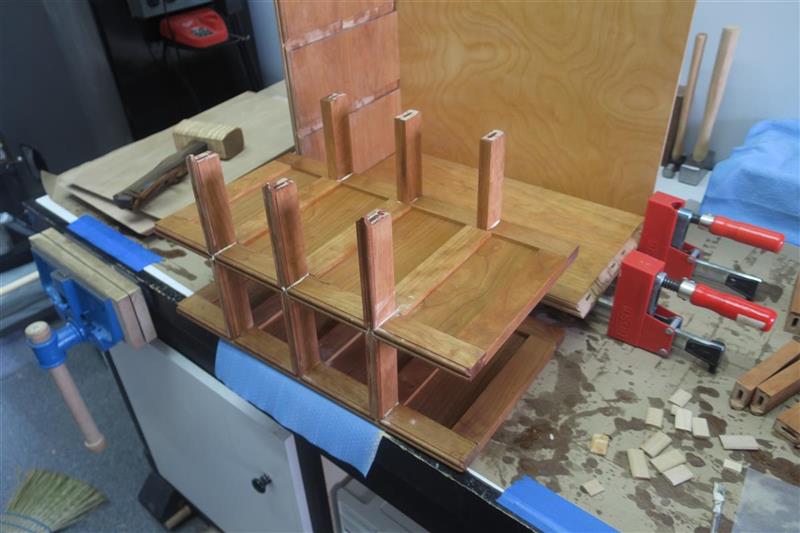
It was an absolute bear to get this assembled within the glue's set time, and it fought me in every way possible. At one point, I had all but one corner aligned. I applied some force to the corner to get it to settle, and heard the dreaded 'CRAAACK'. Split the top panel at the groove for the backer, all the way through, and down 90% of the length.
Not much to do at this point but move on, so I broke out more glue, sawdust, and clamps, and pushed everything back to roughly where it was. Filled
Sanded it flush, filled any gaps with sawdust, and sanded it flush again. Then finished off with the card scraper. The crack runs vertically in this picture all the way across the top panel, and I can see it instantly still, but I think I did a pretty fair job blending it.
Last thing to do was to apply Danish Oil to the exterior of the panels.

Last edited by JohnnyEgo; 07-26-2021 at 14:20.
Math is tough. Let's go shopping!
It's getting there! Hearing a crack during final assembly has to be heart breaking for sure.
Home Stretch:
Some final fitting courtesy of the sander, followed by hand-sand clean up.
Some paste-wax on the runners:
All lined up for final coat of Danish Oil:
I used the actual pull itself to determine the position of the holes.
Quick tap to the marking punch to locate the holes.
Perfectly positioned and drilled.
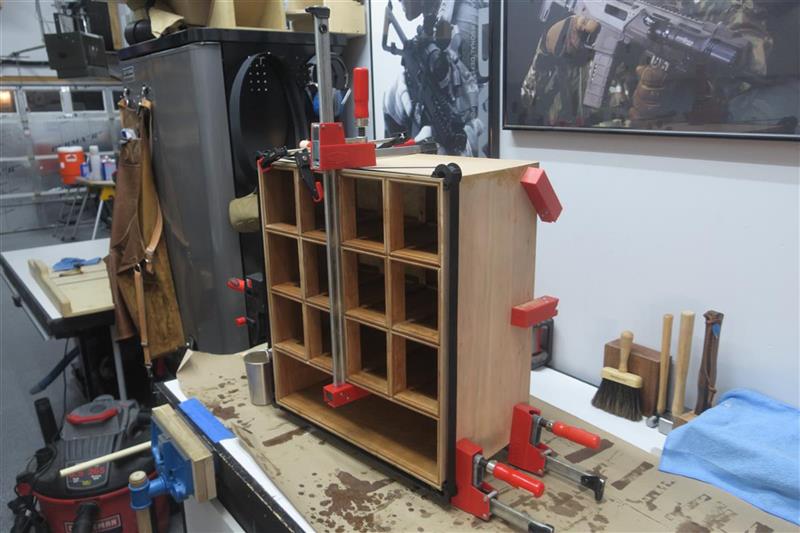
Case is complete, all runners mounted, and the inside waxed and buffed.
Drawer fitted and in place
As complete on the bench.
Final pictures of it in place, and commentary, coming soon.
Math is tough. Let's go shopping!

Looks like vacation gets you motivatedOriginally Posted by JohnnyEgo


The Great Kazoo's Feedback
"when you're happy you enjoy the melody but, when you're broken you understand the lyrics".

You have some of the coolest tools.
I had not seen the locator for the drawer pulls before, and I am a fan of the latest tool flyers.
Great project. Thanks for posting and the updates.

 Posting Permissions


 Reply With Quote