JohnnyEgo, that is so friggin' awesome. I love your posts where you share photos of how you do things. Your work is amazing.

Colorado AR-15 Shooters Club Discussion Forums
Welcome to the Colorado AR-15 Shooters Club Discussion Forums.
Welcome to the Colorado AR-15 Shooters Club Discussion Forums.


JohnnyEgo, that is so friggin' awesome. I love your posts where you share photos of how you do things. Your work is amazing.
"There is nothing in the world so permanent as a temporary emergency." - Robert A Heinlein The Moon is a Harsh Mistress
Feedback for TheGrey

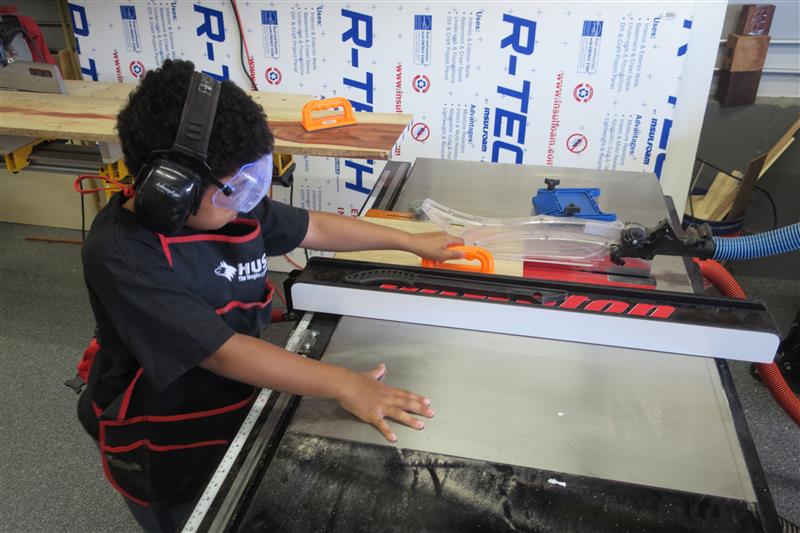
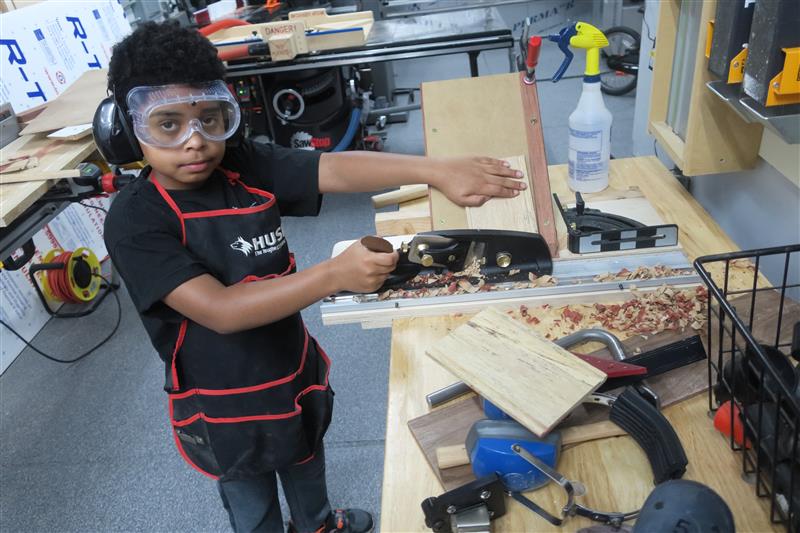
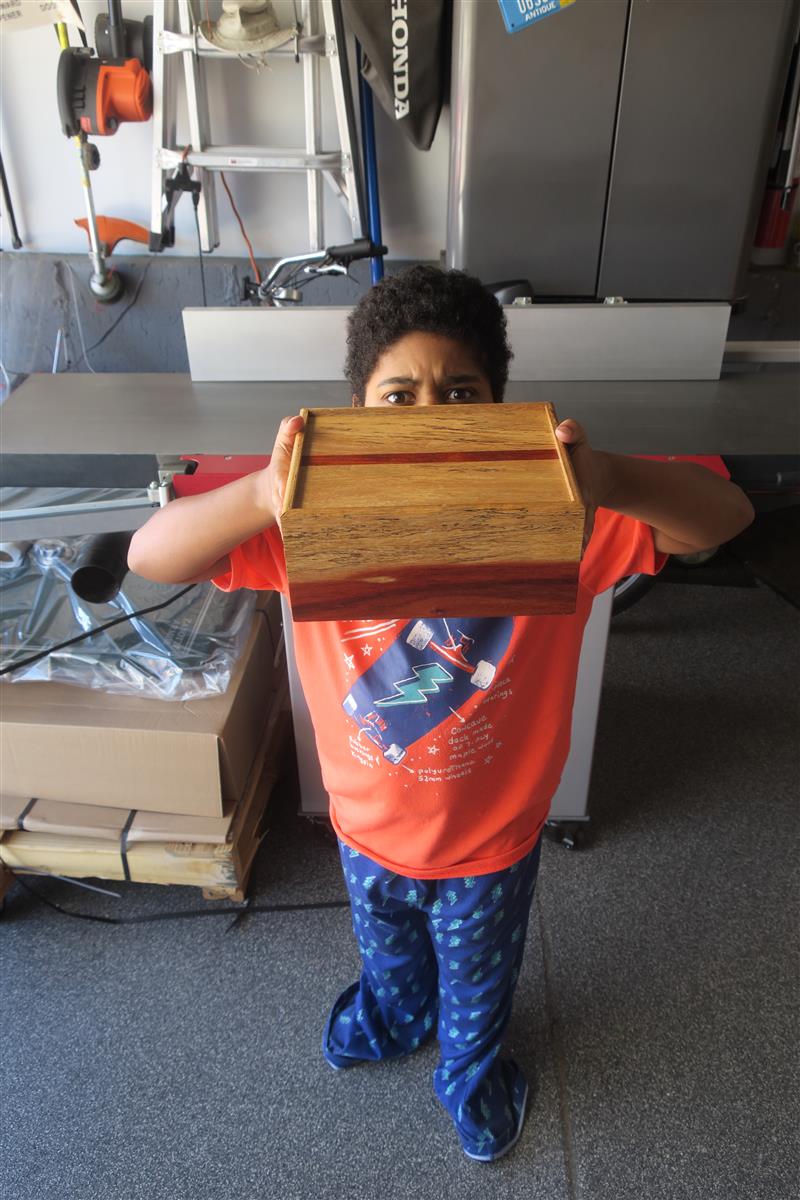
Been making slow progress on the card catalog, and I will post some more pictures, but the part I am doing now is tedious, low-reward, and not very visually interesting. So I put it aside last weekend and helped my kid make a box for his teacher.
Time was fairly limited, but we decided to keep it very simple, with no miter keys or dovetails this year. Just a straight mitered box.
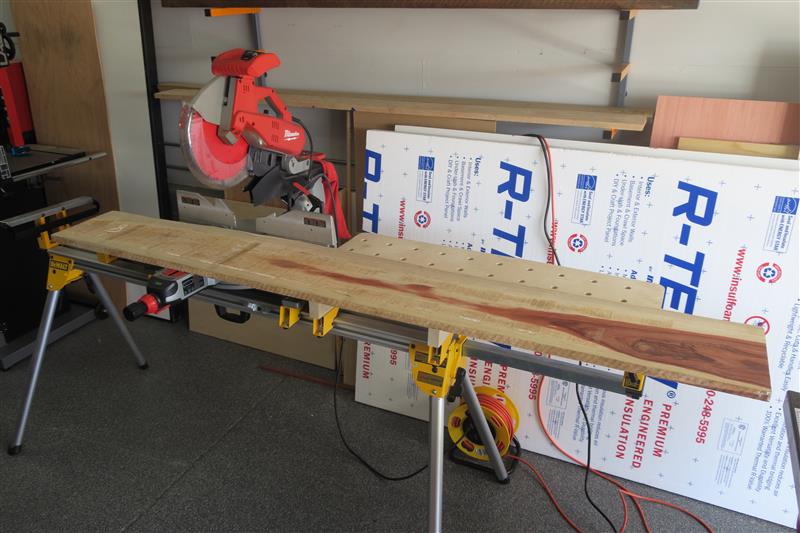
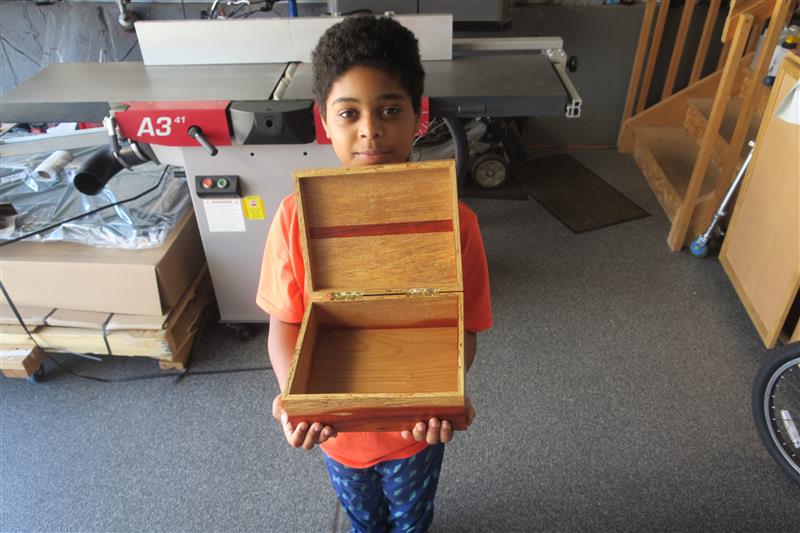
I picked up some Orange Agate from Woodcraft after their 20% off Covid sale. I've never worked with it before, or quite frankly even heard of it before. On the outside, it looked like a fairly tight, dense grain with a creamy color, not unlike holly, and then a very red heartwood core. I'm a sucker for contrast. I didn't have any plans for it other than a vague notion of making some sort of stool, bench, or side table out of it. But making a box for my son's teacher seemed like as good an idea as any.
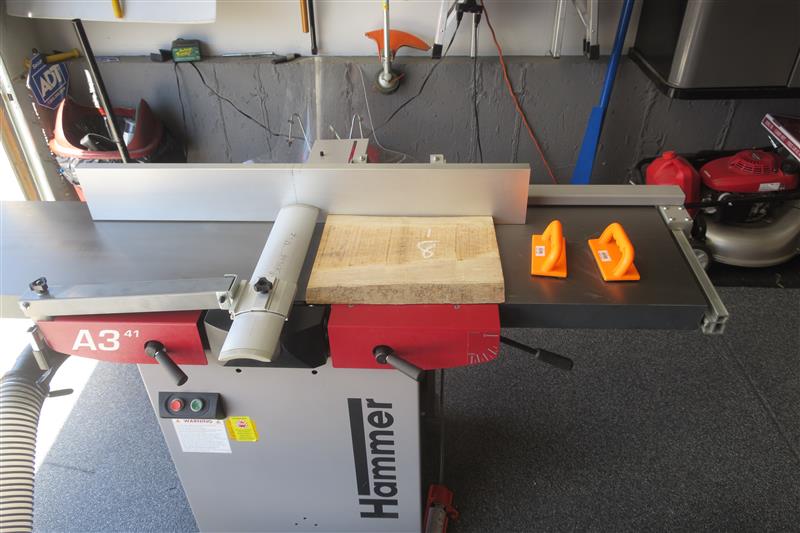
Quick trip to the jointer-planer to clean it up. Noticed right away that it had lost that cream-colored surface, and started showing some signs of spalting and interlocking grain.
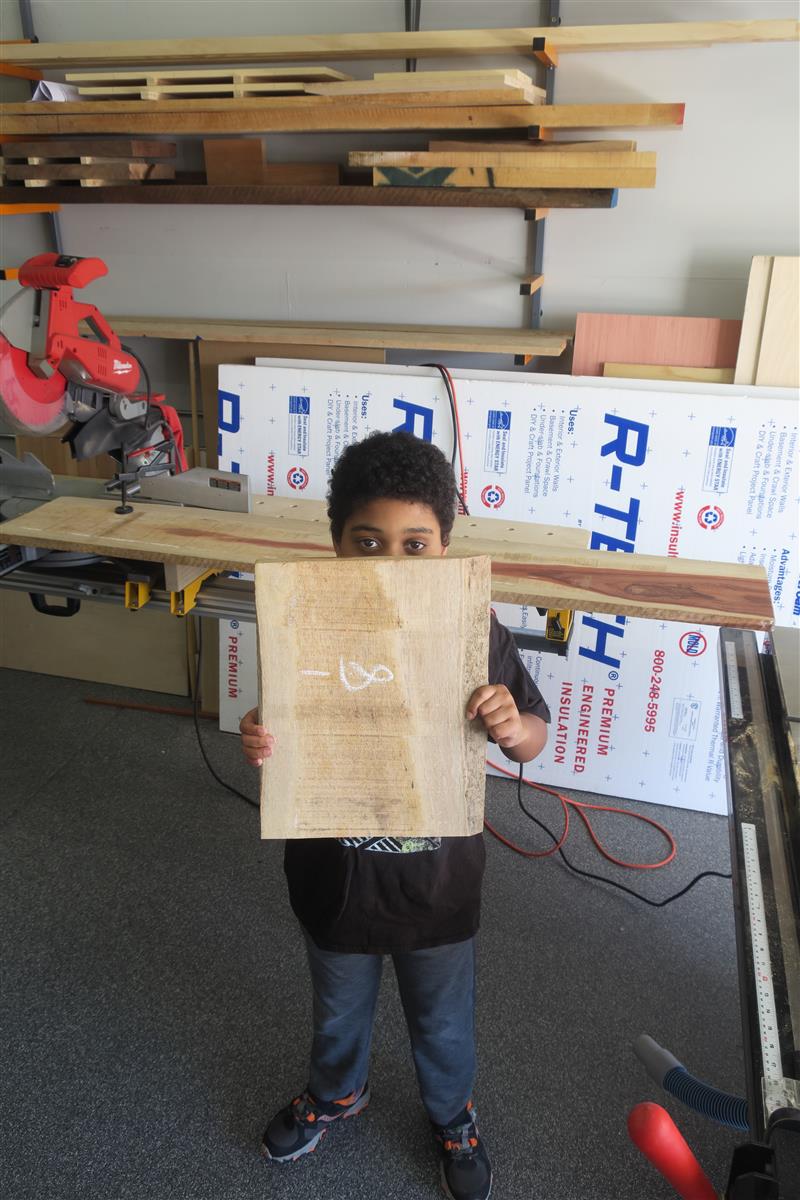
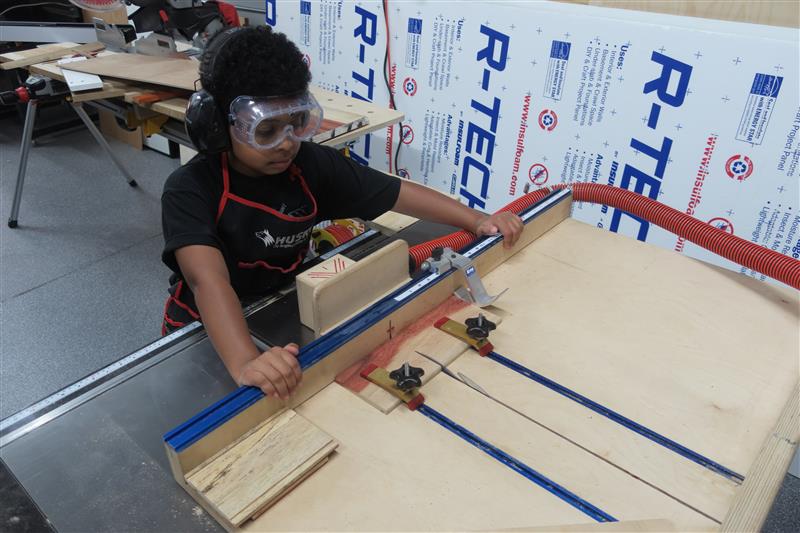
Had my son rip it to width:
Things got a lot weirder when I resawed the blanks for a four-corner book match. A lot more spalting in the white sapwood. Meanwhile, the red heartwood was on such a tight radius that even just taking out the width of the resaw blade, the grain didn't line up in a bookmatch. The heartwood would be present on 3/4 of the width of the front face of the board, and almost non-existent on the back face, within half of an inch. I don't know if that is a common thing with exotics, but I'd never seen it before.
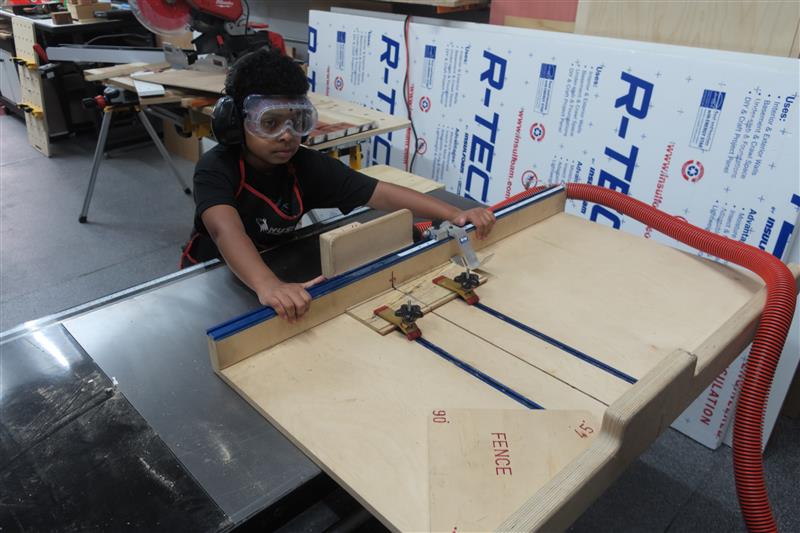
The grain just didn't line up right for a bookmatch, so I decided to just align it to the upper boundary of the heartwood. A little off the bottom of one piece, off the top of the other, until I had a reasonably decent match at each corner. Then I ran a top and bottom groove for the lid and bottom on the router, and turned them over to my son to cross-cut:
Math is tough. Let's go shopping!
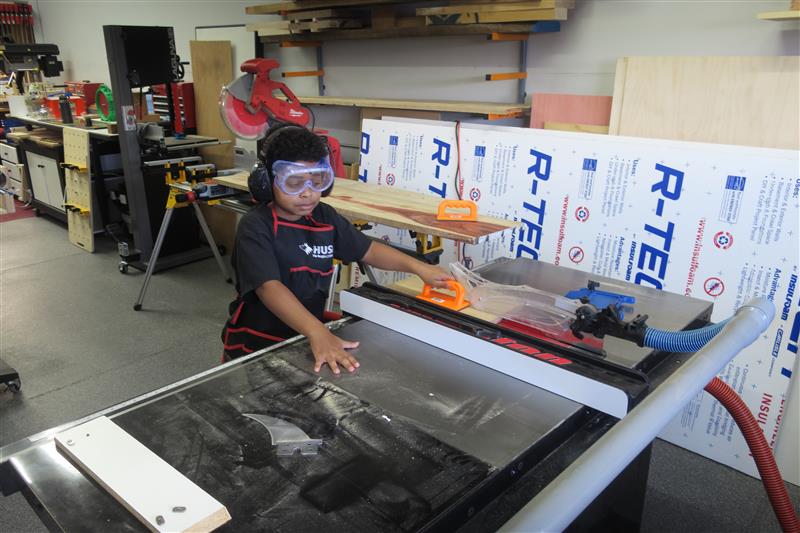
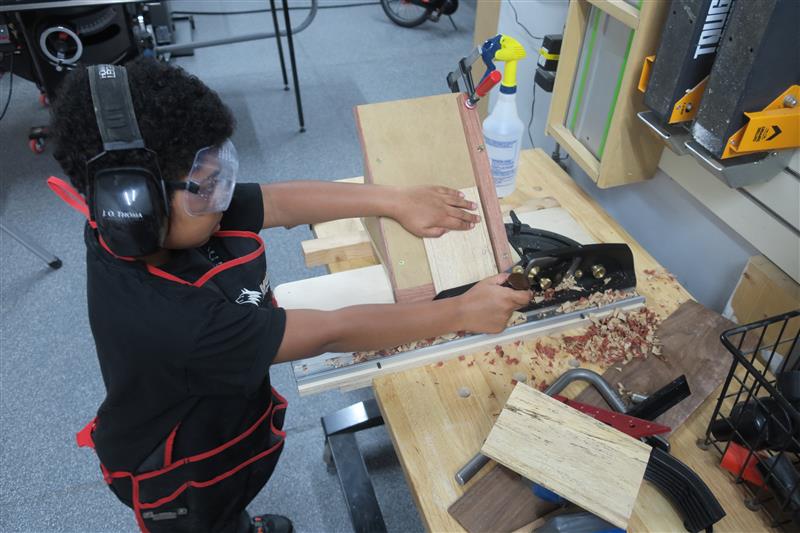
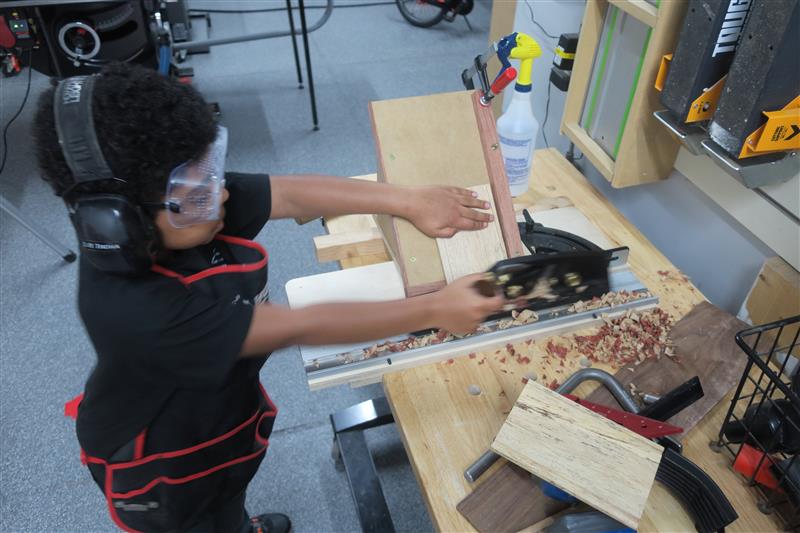
Much to my pleasant surprise, the end grain planed like butter. Beautiful shavings, minimal effort. Because it was so smooth and I had cheap labor available, I didn't even bother pre-mitering the ends at the table saw, just put my son on the miter plane and donkey's ear (the stand that holds the work piece at 45 degrees).
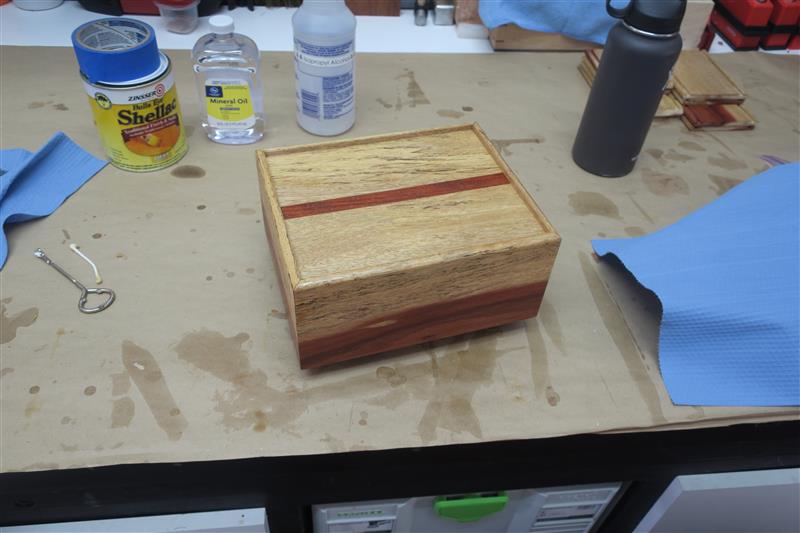
Next came glue, tape, and a lot of shellac. I learned from someone on here that alcohol removes pencil marks, and I am now grateful for that knowledge. I hate shellac. I used it here because it dries fast and doesn't stink, but there is an art to applying it, and I have not acquired that art yet. I did better this time, though. Thinned it out of the can by about 50%, then used a rag instead of a brush. Far fewer streaks than I had on last year's box, though I still ended up with some build-up and runs at the board ends. Not as bad as previous efforts, but it reminded me of why shellac always frustrates me.
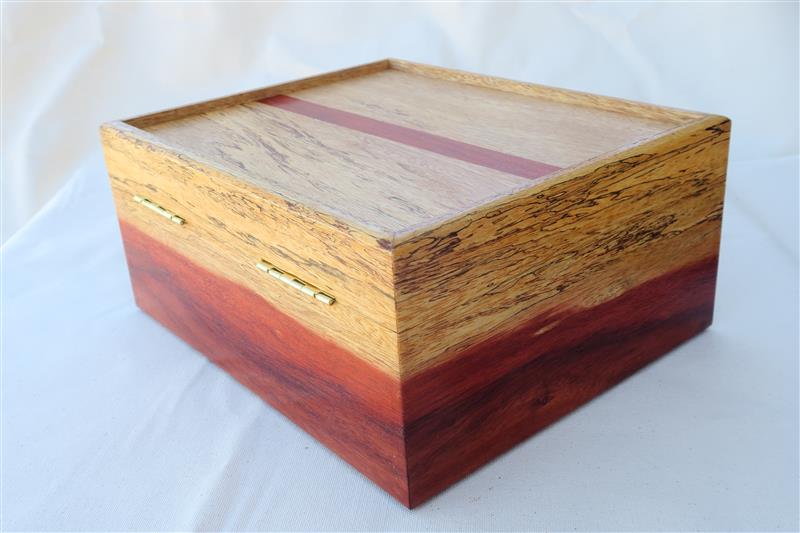
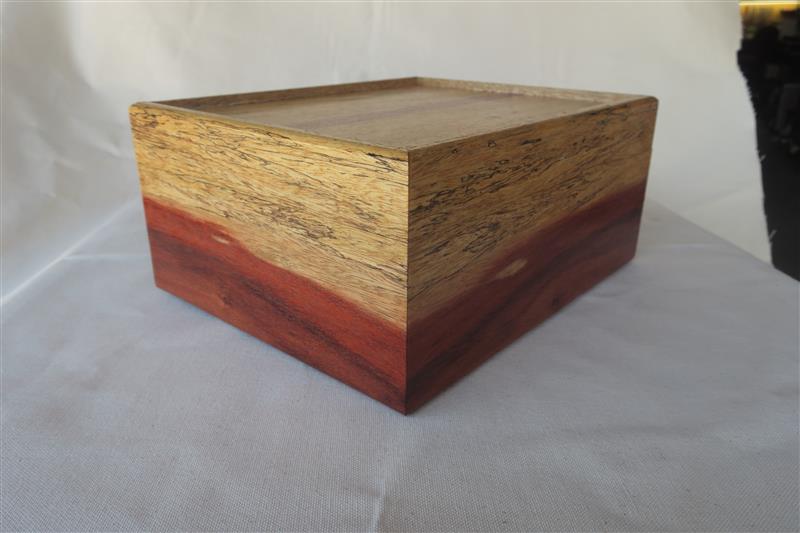
Given that I couldn't truly bookmatch it, the corners still flow quite well. The sapwood is busy enough that it obscures the fact that it doesn't truly align.
Anyways, the whole thing going surprisingly fast this time. We spent three hours from the raw plank to the first coat of shellac, and a fair chunk of that was machine set-up. The longest part of the whole thing was planing the miters, and that took about an hour, of which there were several breaks. We put on eight coats of thinned Shellac over the course of the next day on about 30 minute intervals. Came together very quick, and my wife and son both commented on wishing they could keep it.
The most important customer is pretty happy, though, and that's all that really matters:
Math is tough. Let's go shopping!

I have had these plow discs for years, I got them to make Discada cookers. Finally got around to it.
The rancher I got them from had cut the centers out to repair other discs, the hardest part was filling tho holes.
Ended up making two, they still need a lot of grinding and sanding before they can be used.

^^ That'll be a cool cazo when you're finished!
When learning to weld aluminum, first make sure that you don't have a roll of fluxcore steel wire in your spool gun for some reason. There is an aluminum weld in the middle of all that crap.

Harbor Freight maul comes completely useless from the store.
After about a year of putting off filing this down, I remembered that I have a grinder and flap discs. So while the not the ideal angle, 100 times better than before. This maul flew through the big stumps that we could only make dents in last year. Although, I really think letting them dry for an additional year helped the most.

Stimulating the economy.


JohnnyEgo -I missed your posts from 5/21. That’s an awesome project, and really cool to see your son learning the craft! Kudos.
Thanks for sharing that photo. I was feeling pretty bad about my lawn but now I?m feeling much better.Originally Posted by Frac

LOL
Yes, south facing and no irrigation. It is impossible to grow grass near the house. The patio goes in next summer.
 Posting Permissions


 Reply With Quote